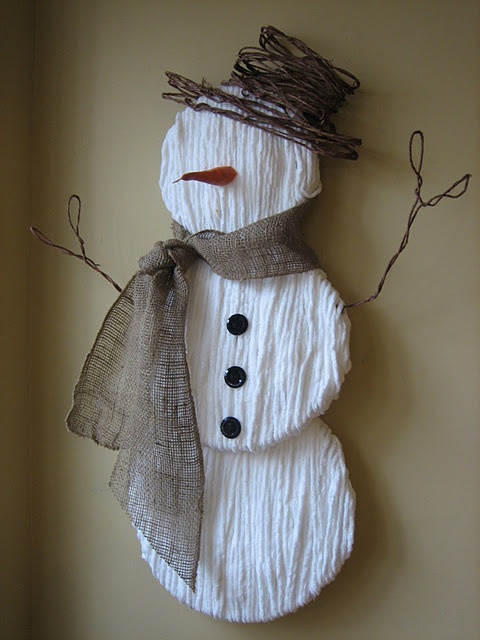
The last few weeks I have been hoarding a bunch of Pinterest pins for Christmas and sorting through them to see what I am going to recreate for my own holiday decor. Well here’s #1! and I just love this pin by Wendy of Craft Goodies, I love natural stuff and burlap really makes me smile. So I have had this on my list to do and here’s my version. My cute snowman is a lot larger, because to me bigger is better!
Yarn Snowman
List of materials I used were: 2 Bernat Baby Blanket (#6 super Bulky) yarn in White (Walmart), Panacea Burlap Garland Roll (Michaels), Panacea Naturally wired twine (Michaels), 3-4ft hard styro foam board (Michaels floral foam section), 3 buttons, a faux carrot, cotton balls or batting, hot glue and a chef knife.
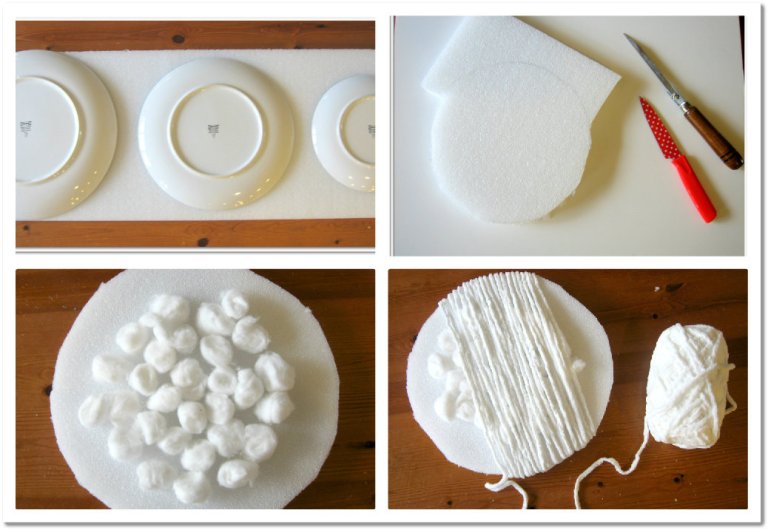
I decided to use a large styro foam board because it is less expensive, but you can buy the foam already cut into 3 different sized circles to skip the whole cutting step. I then placed three graduating in size plates on the foam to draw circles. Cut them out with a chefs knife. They do not need to be super perfect.
Next make a spiral in hot glue in the center of the foam circle and place various cotton balls, this is to make snowman appear fuller, you can use batting if you have it, I had cotton balls on hand so I just used them, again less expensive. Hot glue the end of the yarn to the back of the foam and start wrapping the yarn in one direction. This can be tricky when you get close the sides of the circles, just hot glue the yarn in place. I wrapped the yarn over each foam circle twice to cover all the cotton and foam. Next hot glue the circles together. I overlapped the bottom two and glued the edges together of the top two.
Now for the hat and arms. The twine I used was the perfect color but not the right gauge. Wendy of Craft Goodies used 20 gauge wire. The wired twine I found did not have a gauge on the package, but I thought it would still work and it does. (I found this out trying to make the hat.) The arms & hands are bent shaped and twisted for strength, then just shove them into the foam and hot glue into place.
For the hat: I had to unroll the whole twine and double it and twist it for strength. Then you get two hardback books in different sizes, one for the rim of the hat one for the top of the hat. I will not lie this is the tough part. Wrap the twine around three times for the larger book and press flat. Slip it off and do the same for the smaller book, about eight or nine times. I then took smaller pieces of twine wire and wired the hat together in the back to make it stable. It tends to flop. Slip it over the head and hot glue into place. Cut a small piece of a faux carrot diagonally and hot glue into place. Place buttons and glue into place. Loop a small piece of twine on the back of the head and hot glue to make a hanger. Tie burlap around the neck and trim and you are done!
Source:Facebook

